We tightened up a few edits and added a few shots to make the film clearer. One of the bigger changes was swapping a pothole for a fallen tree. The shots following up to the crash hold the tension a bit more now too.

Wednesday, 25 February 2015
Boy Racer Pre-Vis
We're at a stage now where we're fairly happy with the previs. Below is the 10th edit of our film in the maya.

Friday, 13 February 2015
Life Drawing Christmas 2014
A collection of life drawing's made over 10 weeks in the run up to Christmas last year. Drawn mostly with conte pencils and brush pens over periods of around 5-20 minutes!


Wednesday, 11 February 2015
Initial Storyboard Tumbnails
After the screenplay for the film was written I drew out the story very quickly on post-it notes. Upon seeing the film visually it was clear which parts of the story weren't working properly.
Thumbnails serve as a very rough way to visualise the film. They aren't as polished as final storyboards but the important idea is that they communicate what is happening in the story.

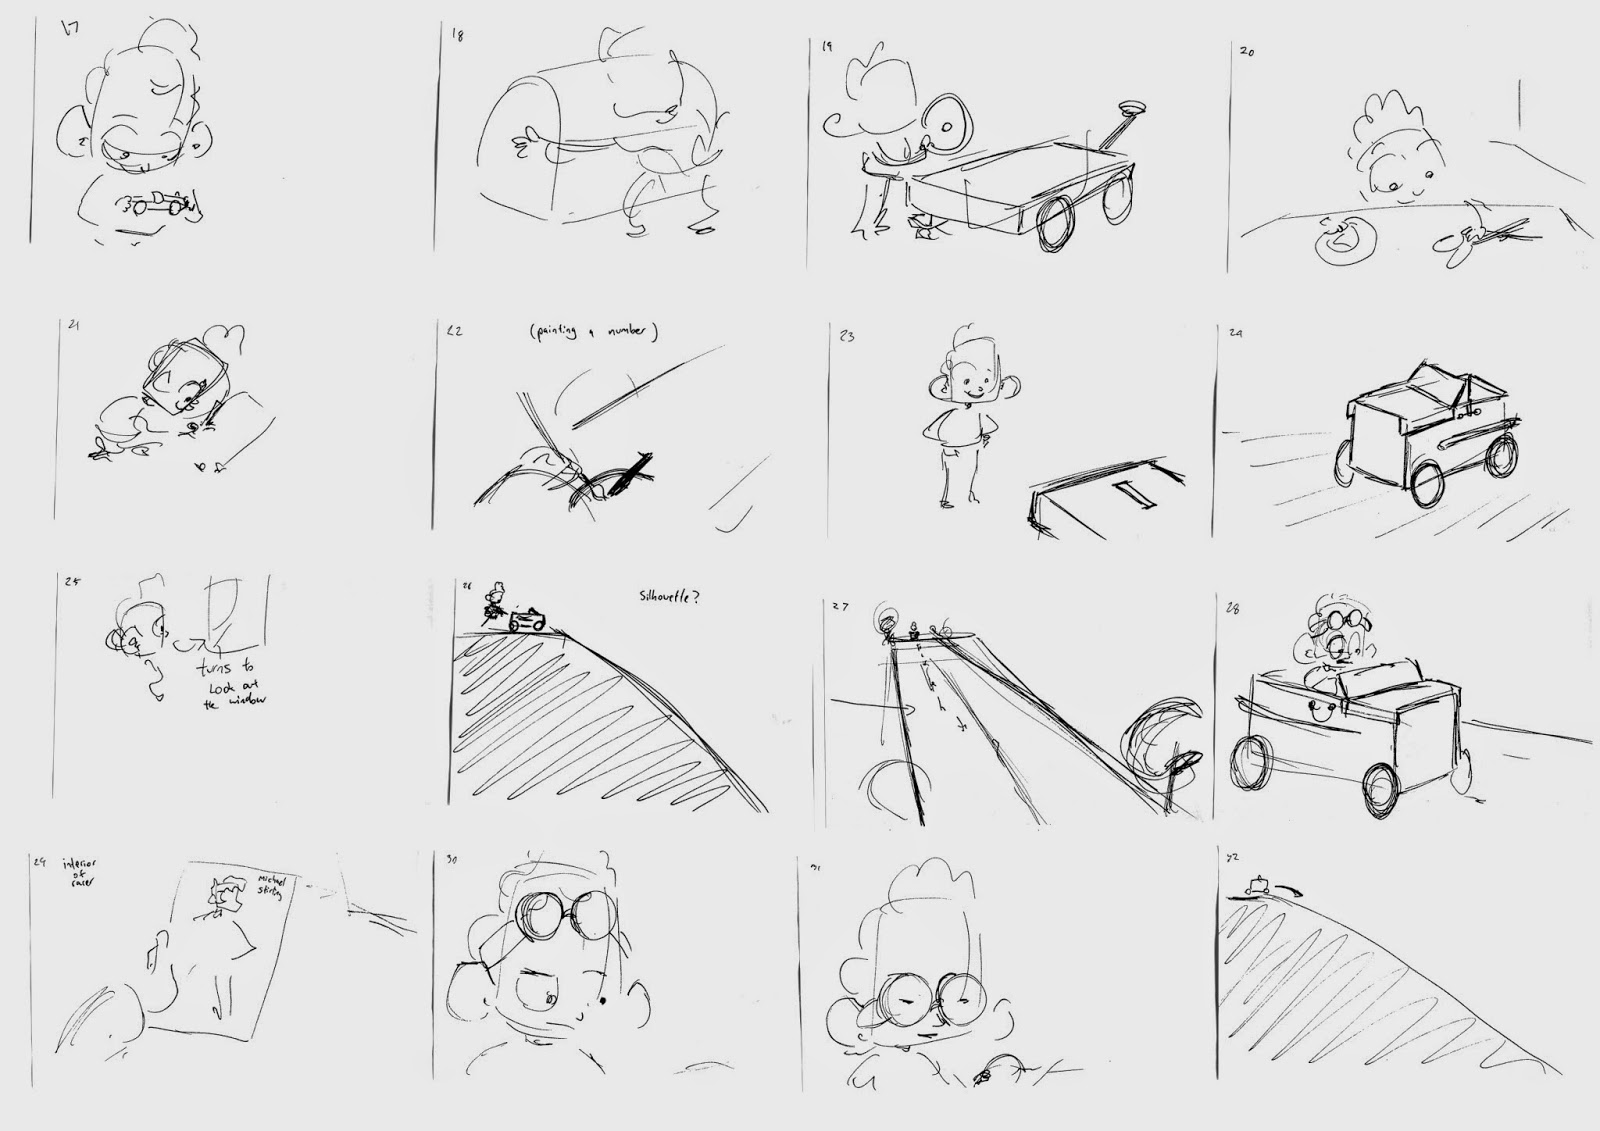


After discussing these initial thumbnails with other coursemates and lecturers we made several changes to the story. Act 1 was shortened considerably so that we could make the downhill scenes as interesting as possible without making the film too long. It also helped pacing of the film too. After these changes a live-action version of the animation was filmed and edited together.
Monday, 9 February 2015
Boy Racer - Short Film
Since the new term has begun at Uni we have been busy creating our film currently titled 'Boy Racer'. This short 2 minute film will make up the bulk of the work for semester B.
Concept
An audacious young boy wants to imitate his Formula 1 idol by racing his home built Formula 1 car down the hill outside.
The story was initially based on an idea of a boy pretending to be an astronaut by racing his sledge down the stairs at home. The idea was then refined through back and forth with the lecturers and team members to the concept above. We committed about a month to working out the story. Story is hard!!
The film will be set during 1975, a golden era for Formula 1 where James Hunt and Niki Lauda were battling for the title.
Character Design
Whilst designing Philip, the main character, I wanted to keep in mind his personality traits to help form the design. He's ambitious for his age of about 9, spritely, full of energy and somewhat foolhardy.

Initial shape exploration

Refining

Final turnaround (colours to be finalised)

Exploring some emotion

Some potential poses for the film
More updates to come!
Monday, 1 December 2014
Another Winter Showreel...
I decided to update my showreel again recently. This was due to ILM offering a tour to 10 of our best students in the 3D and VFX strands out the 2nd and 3rd years.
Winter Showreel 2014 - James Saunders from James Saunders on Vimeo.
Just wanted to say thanks to Josh Thornhill for organising the tour and ILM London for allowing us to visit :)
I decided to pick my best animation's from the past year and put them together in a new showreel that would then be sent to our lecturers. They then selected the best students. Luckily I was one of the students picked!
Winter Showreel 2014 - James Saunders from James Saunders on Vimeo.
Just wanted to say thanks to Josh Thornhill for organising the tour and ILM London for allowing us to visit :)
Saturday, 29 November 2014
Animation Exercises - Winter Showreel
Well, the first submission for animation has past. I just about managed to get the renders done in time thank goodness. The animation's below are a collection of exercises that we we're assigned to do. They were given to us to help reinforce basic principles of animation as well as started to think about performance and story telling.
I thoroughly enjoyed doing them and I'm looking forward to the acting focused pieces we'll be covering over Christmas.
Animation Exercises Winter 2014 - James Saunders from James Saunders on Vimeo.
Thanks for all the help on 3Dhit too :)
I thoroughly enjoyed doing them and I'm looking forward to the acting focused pieces we'll be covering over Christmas.
Animation Exercises Winter 2014 - James Saunders from James Saunders on Vimeo.
Thanks for all the help on 3Dhit too :)
Wednesday, 26 November 2014
Telephone Animation - Refining and Lighting
After some final critiques for the telephone animation I rendered it out for the submission today. The last major change I made to the animation was reducing the head movement after the second take on the phone. This allows the audience to focus more on the character's eye darts. I think it's clearer to the audience this way as it shows him processing the information that is being told to him through the phone.
Once the animation was finalised I started to work on the lighting and renders. To help with the lighting setup I looked at how live action films are traditionally lit and found some useful information:
Lighting
- Classical - Hollywood system during the 1930's.
- Baroque or Theatrical - Extreme lighting focused on emotions
- Modern - 1960's onwards, using existing sources of lighting and then emphasisng them with more lights.
In truth film making today uses a mix of all the 3 above lighting methods
Due to the simple nature of my animation exercises I decided to emulate the classical lighting of 1930's Hollywood which focuses on lighting the actor and his face as best as possible.
The basic lighting setup for this system can be seen in the diagram below:

The key light's role is to duplicate the sun and provide the main source of light. It is generally 40 ° from the camera and angled down on the subject.
The fill light's role is to fill in the shadows created by the key light. It makes sure the shadows aren't too dark.
The back light's role is to separate the subject from the background. They tend to be above the subject to create a rim around the subject's outline. The background is usually lit separately.
Ratio of Key Light to Fill Light:
Generally the key light is three times as strong as the fill light but can vary greatly depending on the film and the emotion. i.e. Film noir generally has a ratio of 9:1
With all this in mind I began to set up my lights in Maya.

I then played around with the exposures of the lights until I had the desired effect. Begin with the key light first and then light the rest. The result is below. Quite a nice looking render! All from simple area lights and a bit of Hollywood knowledge.

The basic lighting setup for this system can be seen in the diagram below:
The key light's role is to duplicate the sun and provide the main source of light. It is generally 40 ° from the camera and angled down on the subject.
The fill light's role is to fill in the shadows created by the key light. It makes sure the shadows aren't too dark.
The back light's role is to separate the subject from the background. They tend to be above the subject to create a rim around the subject's outline. The background is usually lit separately.
Ratio of Key Light to Fill Light:
Generally the key light is three times as strong as the fill light but can vary greatly depending on the film and the emotion. i.e. Film noir generally has a ratio of 9:1
With all this in mind I began to set up my lights in Maya.
Lights in Maya
At Hertfordshire we're fortunate enough to have access to Arnold and the world's first Arnold renderfarm at an educational institute. So I used Arnold for my renders.
Firstly I created a curved background that acted as the floor and the wall. It's curved to get a nice gradient from the lights.
I then created 4 ai Area lights and set them up similar to the lighting diagram above. Notice the large light at the top to illuminate the background. (Also notice how I haven't really placed the key light correctly. It should be angled downwards more on the rig...)
I then played around with the exposures of the lights until I had the desired effect. Begin with the key light first and then light the rest. The result is below. Quite a nice looking render! All from simple area lights and a bit of Hollywood knowledge.
And the final rendered out sequence below:
Telephone Dialogue - Render from James Saunders on Vimeo.
I hope some of this information was useful. The next step is to play around and see what different moods can be achieved by messing with the strengths, colours and angles of the lights.
Subscribe to:
Posts (Atom)